User-Defined Routes 2 – Virtual Networking

Creating a Custom Route
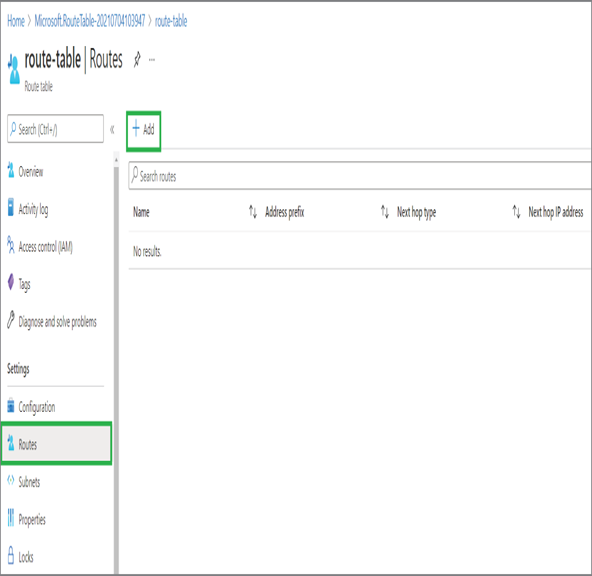
- Sign in to the Azure portal and search for route tables. In the list of route tables, you will be able to see the route table that you created in Exercise 3.4. Click the route table name.
- Click Routes under Settings and then click Add to add a new route.
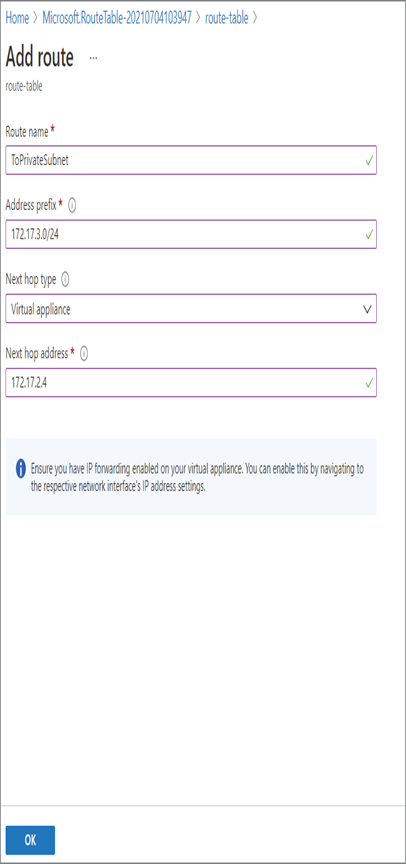
- Now you need to add the route details. You need to add the name to the route. Since you are creating this route to send traffic to a private subnet via NVA, you should give it a meaningful name like “ ToPrivateSubnet”.
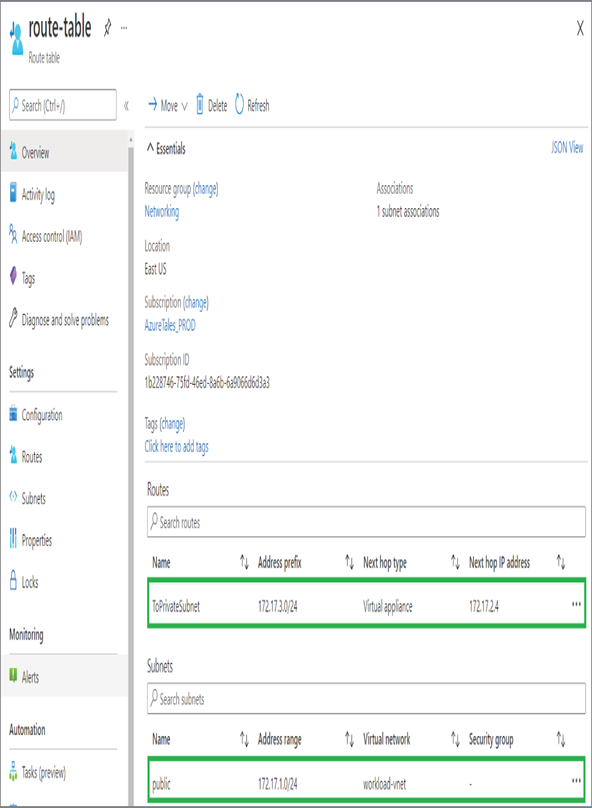
- The address prefix should be the address space of the private subnet. This is the destination IP address range where the route applies. In our case, the value is 172.17.3.0/24.
- The next hop type is going to be virtual appliance as you need to route via NVA. Once you select the virtual appliance, you will be asked to input the IP address of the NVA. Since you haven’t deployed any NVA, you can give an IP address that’s in the address range of the DMZ subnet. We picked the DMZ subnet because that’s where our NVA is deployed. Let’s assume the IP address of NVA is 172.17.2.4 and provide it in the Next Hop Address box.
- If you have followed the instructions correctly, then your route configuration will be similar to the following graphic.
7. After confirming the details, you can click OK, and the route will be added to the Routes blade of the routing table.
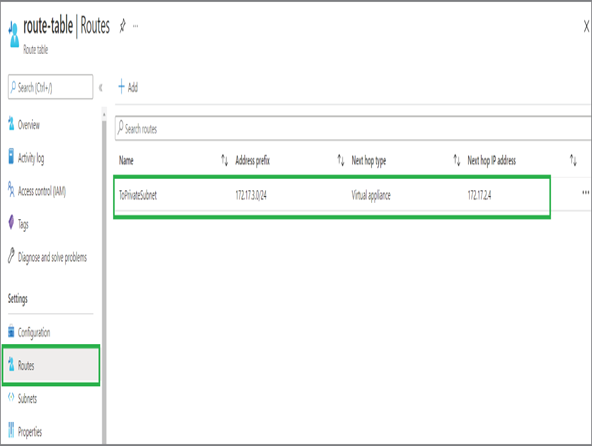
In short, this route will be applied to the private subnet with the address range 172.17.3.0/24, and all traffic heading to any addresses within the address range will be sent to the next hop IP address, which is the IP address of the NVA. The last step in our action plan is to associate the public subnet with the routing table we created. As we already discussed, routing tables can be reused because we associate with multiple subnets; however, each subnet can be associated to zero or one route table at a time. In Exercise 3.6, you will associate the routing table to the public subnet.
EXERCISE 3.6
Associating a Routing Table to a Subnet
- Sign in to the Azure portal and search for route tables. In the list of route tables, you will be able to see the route table that you created in Exercise 3.4. Click the route table name.
- Navigate to Subnets, which is right below the Routes blade that you used in Exercise 3.5.
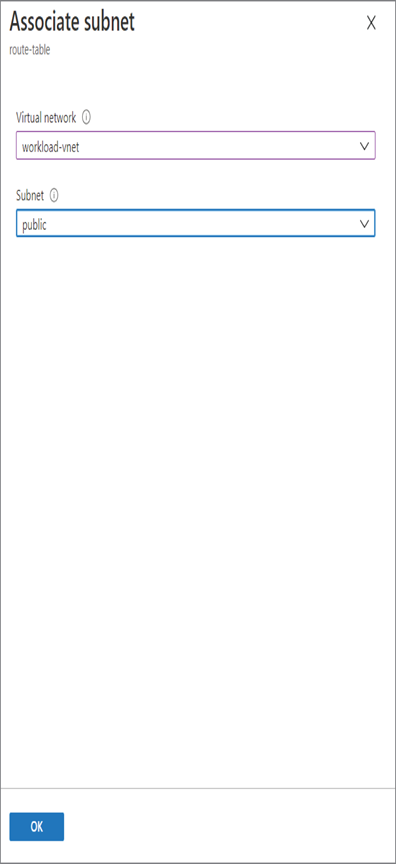
- Once you are in the Subnets blade, click Associate to associate the subnet.
- As shown here, you will be able to associate the subnet by selecting the virtual network and the corresponding subnet. Click OK to confirm the association.
5. You will be able to see the subnet added to the Subnet blade. Also, if you navigate to the Overview blade, you will be able to see both the route and subnet listed.
With that we have accomplished our mission. If you take a closer look at the graphic from Exercise 3.5, step 6, you can see there is a banner. As the banner says, you need to enable IP forwarding on the NVA to forward the traffic to the destination. Since you haven’t created the NVA, you don’t have to worry about this. However, in a real-world implementation of this scenario, you need to ensure that IP forwarding is enabled.
As you saw in the case of other services, Azure PowerShell and the CLI can also be used to manage and configure routes. If required, you can implement the steps using PowerShell or CLI. On that note, we will move on to the next topic, which is service endpoints.