Private DNS Zones – Virtual Networking

As mentioned earlier, Azure DNS can be used to provide name resolution using the Microsoft infrastructure. In Exercise 3.7 and Exercise 3.8, you created a zone and added records for query validation. The zone we hosted in that exercise is an Internet-facing DNS zone because we were able to query the zone from our local computer and resolve the names by pointing to one of the Azure name servers. Azure DNS also supports private zones, which will help in providing DNS service to your virtual network.
Using Azure Private DNS, the resources in your virtual network will be able to use the DNS service for name resolution. By default, Azure makes dynamic DNS updates to a zone that is provided by Azure. However, using a custom domain in lieu of an Azure-provided domain will simplify the DNS names and design the record names as per your organizational standards. Azure private zones can be used by virtual machines deployed in the virtual network as well as by the connected networks. In Exercise 3.9, we will create a private DNS zone and understand how we can link a virtual network to the zone.
EXERCISE 3.9
Creating a Private DNS Zone and Validating Resolution
- Sign in to the Azure portal and search for DNS Zones and click Private DNS Zones.
- The creation parameters are the same as the public domain that you created earlier. You need to fill in the subscription, resource group, name of the domain, and location of the resource group (if you are creating a new resource group). Refer to the graphic shown here to view the parameters.

- Once you have filled in the parameters, click Review + Create to start the validation. After validation, click Create to create the zone.
- Now you need a VM and virtual network to test the DNS resolution. To speed up the process, let’s use Azure PowerShell from the cloud shell to create the virtual network and virtual machine. You can use the same commands from Exercise 3.2.
- Once you have created the virtual network and subnet following the steps mentioned in Exercise 3.2, let’s create a VM using the following command in the Azure cloud shell (use a resource group name and VM name as per your environment).
New-AzVM -ResourceGroupName dns-zone `
-Name vm-01 -Location ‘East US’ `
-VirtualNetworkName vnet-eus -SubnetName subnet-01 `
-Image UbuntuLTS -Credential (Get-Credential)
- You will be asked to provide the username and password for the VM; once that is shared, your VM will be deployed. Note the public IP address returned by the shell; we will use this later to connect to the VM.
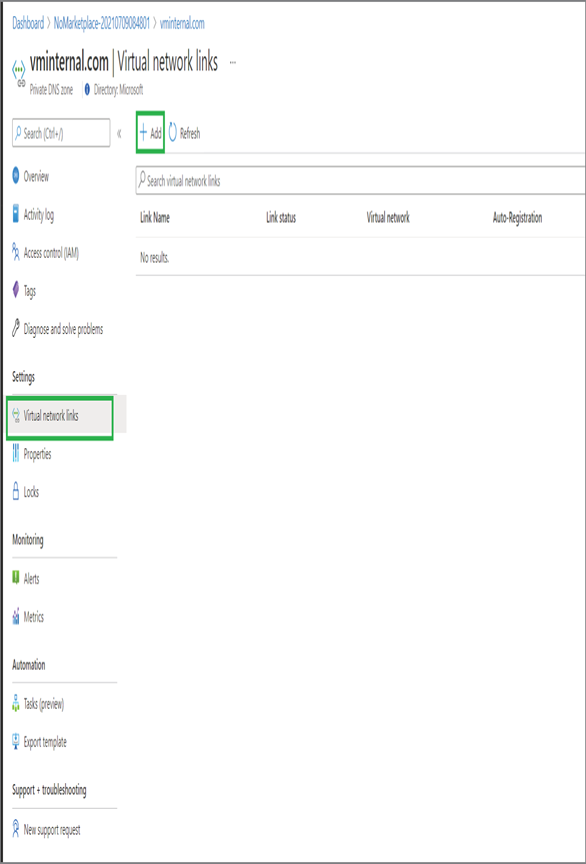
- Now it’s time to link the virtual network to the DNS zone you created in step 2. Navigate to Private DNS Zones and click the zone you created.
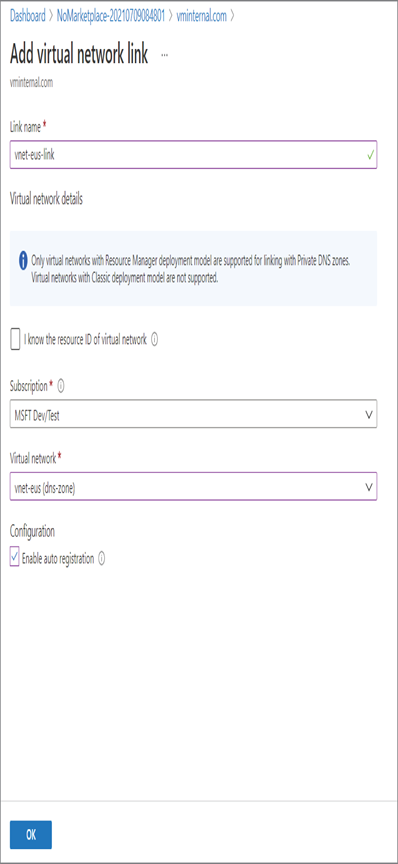
- Navigate to Virtual Network Links and click Add.
9. To create a link, you need to provide the name of the link and select the virtual network to which you want to create the link. There is also an option for enabling autoregistration. Enabling this will help in Dynamic DNS updates whenever virtual machines are connected to the network. There is another option called I Know The Resource ID Of The Virtual Network. If you have the resource ID of the virtual network, then you can directly specify that instead of specifying the virtual network. For now, we will go with the default option and select the virtual network manually. Once you have filled in the information, click OK to create the link.