Private DNS Zones 2 – Virtual Networking
- Once the link is added, you will be able to see it in the list of virtual networks that are linked. You need to click the Refresh button next to the Add button and make sure that the link status is completed before you perform the next step.
- Navigate to the Overview blade of the private DNS zone, and you will be able to see that an A record for the VM created is added to the zone. Create another A record, say with a value of backend and an IP address of 1.1.1.1. You can provide any value and IP address, as this is for testing only. Adding a record set is the same process outlined in Exercise 3.8.
- Once the record is added, navigate to the cloud shell and SSH to the VM using the command ssh username@IP. You need to replace the username with the username that you provided during the VM creation and replace the IP address with the public IP address of the VM that we noted earlier.
- After logging in to the VM, try ping backend.vminternal.com where vminternal.com is the private DNS zone you created and backend is the A record.
- You can see that the name is resolved to the IP address and the ping is working.
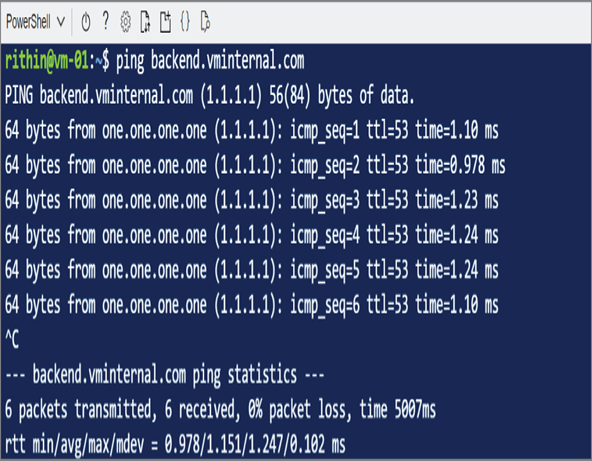
This proves that the virtual network link added to the private zone is working and the virtual machine is using the private DNS zone for name resolution. You can create another VM in the same virtual network, and the record will get automatically registered to the zone. You can link multiple virtual networks to the same private zone and have all of them resolved by the private zone.
With that we have completed the topic of Azure DNS. The main takeaway is to understand how the Internet-facing zones are working and how the private zones work. On that note, we will move on to network security groups.