Custom RBAC Roles 2 – Compliance and Cloud Governance

Creating a Custom Role Using PowerShell
- Sign in to the Azure portal and open the cloud shell; then switch to PowerShell. You can also use a local shell if you have installed the Az PowerShell module.
- In the cloud shell, you can use the command Get-AzRoleDefinition | FT Name. This command will list all the roles available in Azure. You need to pick a role that is closer to the role that you want to create. If you are unsure, then go with the Owner role.
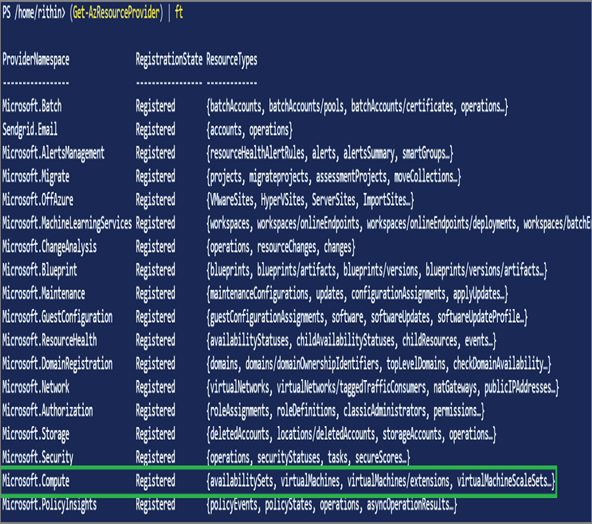
- Now you need to understand the operations that you want the user to have access to. In our case, we need permission to start or stop VMs. Every resource has a resource provider that is responsible for all operations that we are performing on the resource. The resource provider for virtual machine is Microsoft.Compute. If you would like to see the resource providers and resource types supported, you can use the PowerShell command Get-AzResourceProvider | FT. As shown here, you can see the virtual machine is part of Microsoft.Compute resource provider.
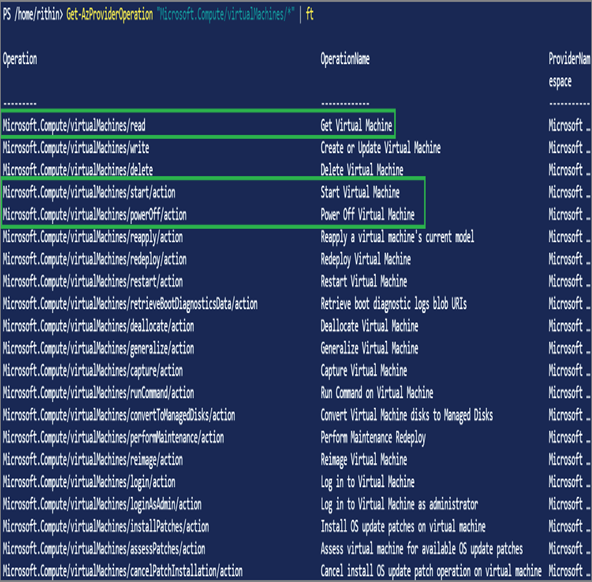
4. The VM related actions are part of the Microsoft.Compute/virtualMachines namespace. We need to find the operations available for this provider. The operations can be found using the command Get-AzProviderOperation “Microsoft.Compute/virtualMachines/*”. As shown here, you can see the operations required for viewing, starting, and powering off the VMs, namely, Microsoft.Compute/virtualMachines/read, Microsoft.Compute/virtualMachines/start/action, and Microsoft.Compute/virtualMachines/powerOff/action.
5. You are done with the first set of permissions required for the virtual machines. Now you need to find the operations required for managing support tickets. If you list the resource providers, you can see that Microsoft.Support is responsible for support tickets. Since you need all operations under this name space, you can set operations to a wildcard by adding an asterisk as in Microsoft.Support/*.
6. To summarize, our role should have the following operations to match our requirements:
- Microsoft.Compute/virtualMachines/read: Getting the virtual machine
- Microsoft.Compute/virtualMachines/start/action: Operation to start VM
- Microsoft.Compute/virtualMachines/powerOff/action: Operation to power off VM
- Microsoft.Support/*: All actions related to support tickets
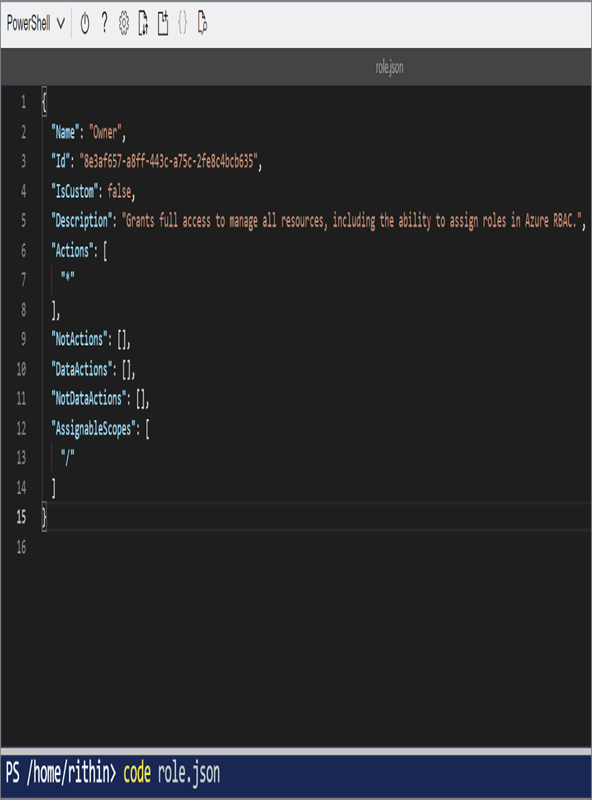
- Now you need to clone a built-in role and modify the JSON with the permissions in which you are interested. Clone the Owner role using the PowerShell command Get-AzRoleDefinition -Name Owner | ConvertTo-JSON > role.json. This command will export the definition to a file role.json and will be saved in your cloud shell or local directory depending on which one you are using.
- You need to edit the JSON file and customize it. If you are using a local shell, you can use any text editor like Visual Studio Code, Sublime, or even Notepad. In the cloud shell, there is a built-in editor that you can use. You can invoke the code editor in the cloud shell by using the command code followed by the filename. In our case, we are using code role.json.
9. After making the modifications, you can hit Ctrl+S and then Ctrl+Q to quit the editor. The following is the modified version of the file:
{
“Name”: “Virtual Machine Supporter”,
“Id”: “”,
“IsCustom”: true,
“Description”: “Read, start and stop VMs. Create and manage support tickets”,
“Actions”: [
“Microsoft.Compute/virtualMachines/read”,
“Microsoft.Compute/virtualMachines/start/action”,
“Microsoft.Compute/virtualMachines/powerOff/action”,
“Microsoft.Support/*”
],
“NotActions”: [],
“DataActions”: [],
“NotDataActions”: [],
“AssignableScopes”: [
“/subscriptions/<yourSubscriptionID>”
]
}
10. You have the modified JSON file, and now you can create a new role using the New-AzRoleDefinition command. For this exercise, you can run New-AzRoleDefinition -InputFile ./role.json, and the output will be similar to the graphic shown here:

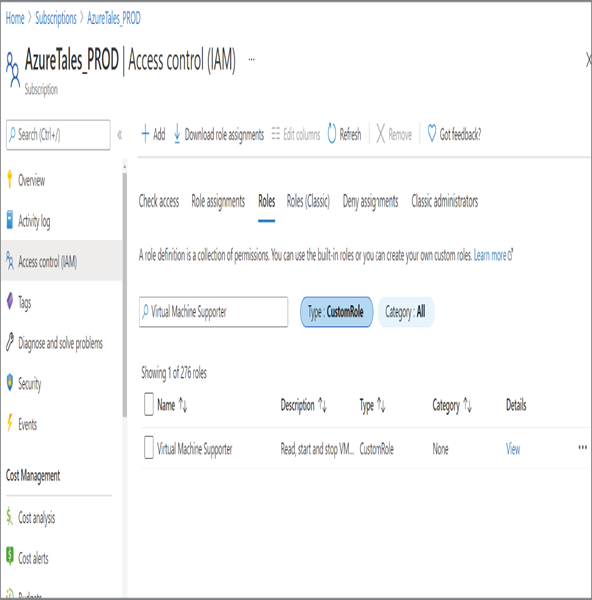
11. Navigate to Azure Portal ➢ Subscriptions ➢ Select Your Subscription. Click Access Control (IAM) and switch to the Roles tab. If you search for Virtual Machine Supporter with the Type = CustomRole filter, you will be able to see the custom role you just created.
In this exercise you created a new custom role in Azure using Azure PowerShell. You can also create roles from the Azure portal, which is easier compared to performing the same steps from PowerShell. However, understanding PowerShell is really useful if you are scripting and creating roles on the go. You can use the same JSON file in the Azure portal or add permissions one by one by exploring each of the resource providers. If you are interested in testing it using the Azure portal, you can refer to the following:
https://docs.microsoft.com/en-us/azure/role-based-access-control/custom-roles-portal
Now that we have created the custom role, let’s see how this role can be assigned to our users.